Approval Widget in CRM Use Case
Use ProcessMaker I/O to build in custom approval workflows into any CRM, ERP, or DMS Software. This use case walks through how to embed the ProcessMaker I/O widget into a CRM software to drive custom approvals.
Video Walk through of this Tutorial
If you would like to see how to add custom approval functionality to any CRM in action, click this video below.
General Description
This example shows users how to use the power of the ProcessMaker I/O workflow engine as an integrated widget in an easy way. In this use case, Processmaker I/O is integrated with a sample customer CRM system to add workflow and bpm features.
In this example, we will build on top of a free, open-source CRM called Flarepoint. However, this could be done with ANY CRM. For our CRM use case, we have created a Loan Management example. Banks, companies, credit unions, government agencies, and many more types of entities are often faced with the challenge of expanding their CRM usage to incorporate the management of a decision process, such as a loan approval process. This pushes most CRMs beyond their capabilities because CRMs are not workflow automation systems, they are transactional systems. As such, they don't have a way to manage decision flows that involve embedding APPROVE / REJECT decisions in the system. Previously, the alternative was to add a full blown BPM system to the mix to pass information from the CRM to the BPM system to manage approval workflows. Now, ProcessMaker I/O can be integrated with a CRM to bypass adding an entire BPM system. It is light-weight and allows users to add this decision point and workflow directly into the CRM system.
So, in this example, we have added the loan approval workflow directly to the Flarepoint CRM system. You still manage all CRM functions as you would normally - adding clients, managing their profiles, documents, etc - but now you can create loans that generate an approval workflow with full routing controls. In the picture below you will see the Approve/Reject buttons in green and red. These have been added to the CRM to generate actions in the ProcessMaker I/O API.

Subscription Use Case
Process Description
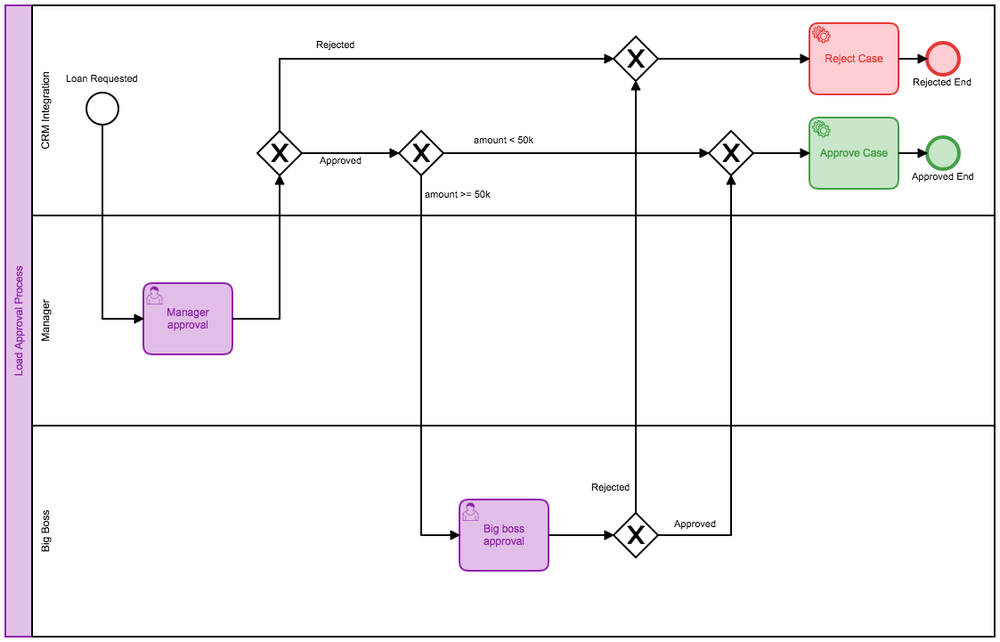
Imagine we have an external CRM system. We want to add the ability to create and approve loans for our CRM customers. We have 2 CRM users (Manager and Big Boss) that have to make a decision to approve or reject a loan request depending on the amount of the loan.
- Manager creates a new loan in the CRM and fills in the request with customer data or uses the current loan request
- Manager assigns this loan to the Approver
- Approval process starts and the approval widget appears in the CRM interface (ah...the magic happens)
- Manager makes the decision
- If the amount is >50K, the loan is moved to the Big Boss for approval
- When all decisions are made, the Script task records this operation to the log file
- Decision for the loan is recorded to the CRM
Process Scheme
Getting Started with the Use Case
How to Launch an Instance* of ProcessMaker I/O
*ProcessMaker I/O is an "always on" cloud service. In this document an instance refers to an installation of ProcessMaker in a virtual machine or a container. This instance is created, launched and managed directly through the ProcessMaker I/O web management console.
If you don't have an instance of ProcessMaker I/O yet, please:
- Go to the Instance page.
- Click Create an Instance and follow the instructions provided.
If you already have a ProcessMaker I/O instance, please:
- Launch an instance of ProcessMaker I/O on the Instance page.
- Copy the instance URL link; it will be required later
- Click on the Examples - "Click to open" link
- Switch to the CRM example tab on the top
- Click on the Import tab and upload the BPMN file from your PC.
- After going to [ProcesMaker I/O SDK](https://docs.api.processmaker.io/) you should create another user to use in our example later.
How to Set Up and Integrate a ProcessMaker I/O Widget to Use with a Custom CRM
Follow the next steps to integrate our CRM with ProcessMaker I/O.
- Generate user access token keys for both users to give them access to the ProcessMaker I/O API.
- After generating the token keys, you should bind them to the users in the CRM.
- For any requests to the Processmaker I/O API, you should get the external URL of the ProcessMaker I/O instance (example: https://somesubdomail.api.processmaker.io/api/v1)
- Before you start, you should download an example of the process in .bpmn format and import it to the ProcessMaker I/O instance using our portal [ProcessMaker.io](https://www.processmaker.io).
How to Run the Process:
Make a request to the start event "Loan Requested" of the ProcessMaker I/O instance endpoint by calling a "webhook" using the GET method on the event.
When the CRM creates the new loan (example of request: https://somesubdomail.api.processmaker.io/api/v1/processes/Loan%20Request/events/Loan%20Requested/webhook) then pass the following in GET arguments:
* Amount - requested amount,
* Case_ID - ID of the case in the CRM system,
* CRM_callback - the URL for call backs that can be used for reverse connections.
Initiate the widget - it will listen for the statuses of newly created loans and make the following requests to the ProcessMaker I/O instance:
Check the Status of the Manager Task:
* Request the process instance ID by passing "case_id" to the request (example: processes/Loan%20Request/datamodels/search/case_id='+{{case_id}}).
* After that, we can use the instance ID and the name of user task (Manager approval) to retrieve the delegated task for our Manager user:
"instances/instanceId/tasks/Manager%20approval/task_instances/delegated"
In our case there will be 1 delegated task. We should show 2 buttons - decline and approve.
To save the manager's decision, we should make a PATCH request to the "task_instances/taskInstanceid" API endpoint by passing the updated decision parameter and turning on tasks with COMPLETE status in the data model:
``
data = {
'data': {
'type':'task_instance',
'attributes': {
'status':'COMPLETE',
'content':{'manager_status':decision}
}
}
};
``
Show message: You've made a decision.
The same logic can be applied to the Big Boss decision:
Check the Status of Big Boss Task:
* Request the process instance ID by passing "case_id" to the request (example: processes/Loan%20Request/datamodels/search/case_id='+{{case_id}})
The request delegated to the Big Boss is: ``instances/instanceId/tasks/Big%20boss%20approval/task_instances/delegated`` and as in the Manager side, pass the updated decision parameter and turn on tasks with COMPLETE status:
``
data = {
'data': {
'type':'task_instance',
'attributes': {
'status':'COMPLETE',
'content':{'big_boss_status':decision}
}
}
};
``
After that, operations in the ProcessMaker I/O instance will run "Reject Case Http connector" or "Approve Case Http connector" and will make the request to our CRM with the call back URL that we passed to the Start event with the final status of the case: approved or rejected. Our CRM turns on the case status according to the final status.
How to Install FlarePoint CRM with the Integrated ProcessMaker I/O Widget
To demonstrate all the theory described below, you can use our already modified Flare Point CRM.
How to Install Flare Point CRM
- Insert the project into an empty folder / git clone *address of changed CRM REPO*
- Create an empty database table
- Copy .env.example to .env and insert the Database config
- Run the following commands:
```php
composer install
php artisan migrate --seed
php artisan key:generate
`` - Log in with these credentials: Email: admin@admin.com, Password: admin123 (can be changed on the dashboard)
Set Up the Processmaker I/O instance
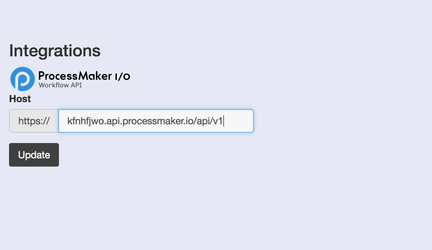
- Go to Settings >Integrations and paste the URL of your ProcessMaker I/O [instance core](#create_instance).
[core url](images/paste_core_url.PNG)
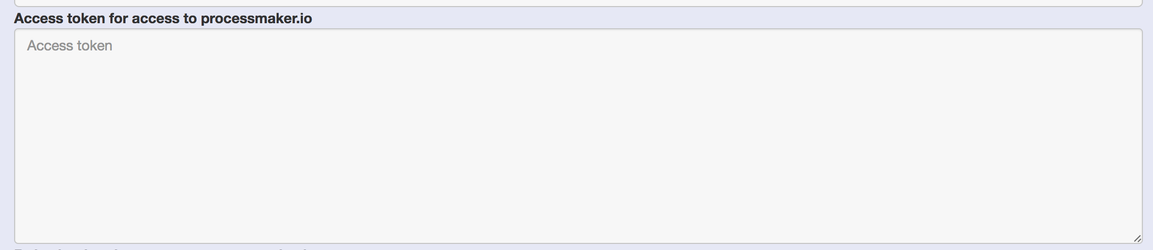
- Go to the Users section and paste the access token keys for the two users that you got from ProcessMaker I/O [instance core](#create_instance).
[access token](images/paste_access_token.PNG)